Catching up – better late than never!

Well hello again, if anyone is still reading this… haha. I can’t believe how fast this year has gone!! I stopped blogging because I was busy getting ready for the wedding, and now it’s almost our first year anniversary! Yes, we’ve made it almost a year without killing one another; I’d say it’s going well LOL. Ah, true love >.<

I haven’t stopped sewing, I’ve simply gotten out of the habit of shooting and blogging what I sew… to be honest, I’m not sure I will get back into it the same way I did before, but I felt compelled to write this entry at least ^_^ These days, I’ve been much more active on Instagram, as it just seems to fit into my lifestyle better, but I do miss writing sometimes so I think I’ll try and pick up the blog again, even if it is different than before. There’s a possibility that there’ll be more food, cats, yoga, travel, and art though! LOL

Anyway, here’s a few highlights from my year, in terms of sewing:

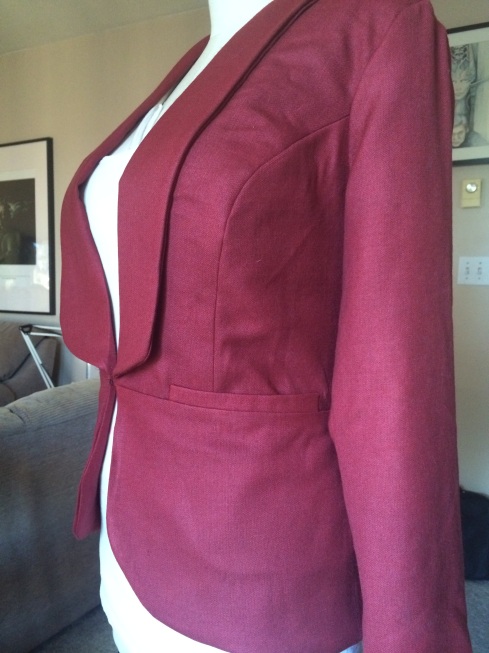
My wedding of course:

img_2996

Mr and Mr Ruston – I’m wearing my handmade wedding jacket here. The classy bound buttonholes belie the rockstar attitude lol

img_3046

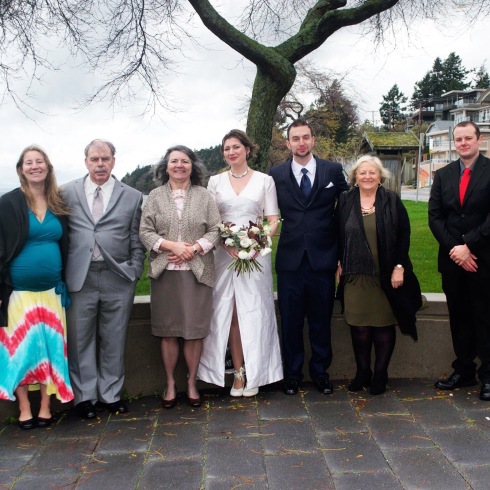
wedding family photo left to right: my sister, Christina, my mom and stepdad, me, my husband, his mom, and his best friend Kyle.

img_3211

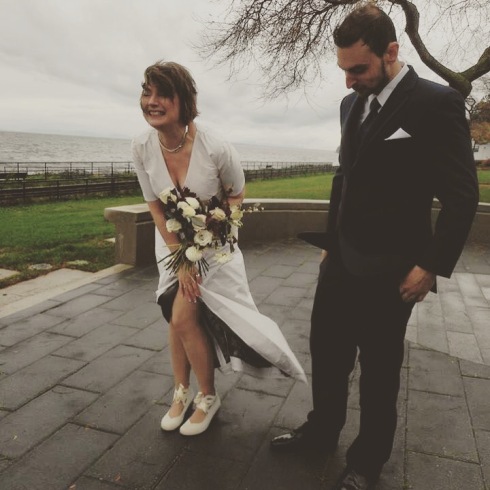
we got married outside and the morning was VERY windy – it kept blowing my dress around! LOL

To be honest, I wasn’t in love with my dress. I hear a lot of girls saying they loved their dress, it made them feel like a princess, blah blah blah… but frankly, that kind of puts a lot of pressure on a garment doesn’t it? Especially one you made yourself! I put a LOT of work and planning into this dress, and a year later I look back and I don’t hate it, but it was not the magical fairy garment I thought it would be. Here’s the thing, though… when I finally got in front of my husband to be and we looked into each others eyes, what we were wearing, where we were, and who was there didn’t matter. Only the fact we two best friends were standing there together, mattered. I hope everyone who gets married has that feeling ^_^ ❤

I have made several unblogged garments since then and I think my skills have improved considerably. I’ve learned to pay attention to what I actually wear, and spend time making those things. Not surprisingly, a LOT of my wardrobe is made up of Named patterns.

Since the wedding I’ve made:

  • plaid PJ pants
  • Colette Wren in black French terry (long sleeved, slim skirt option)
  • BHL Georgia dress in wine and black brocade
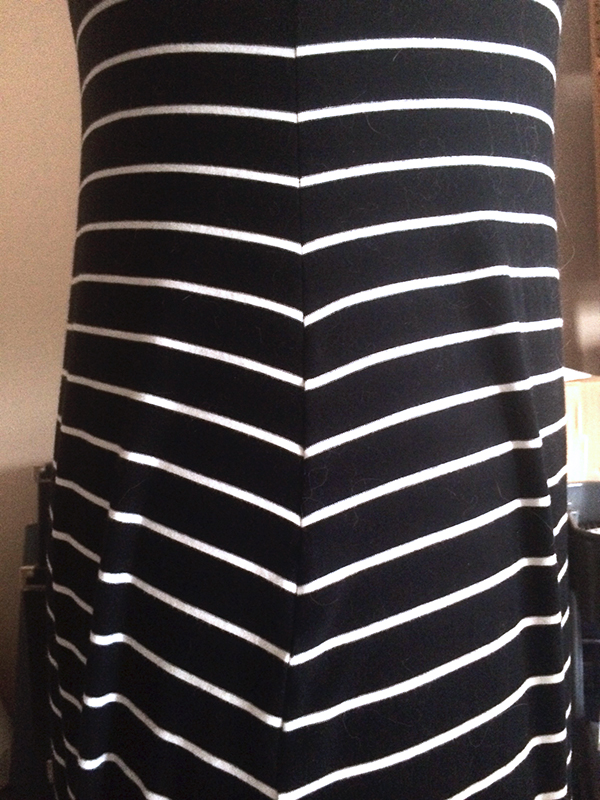
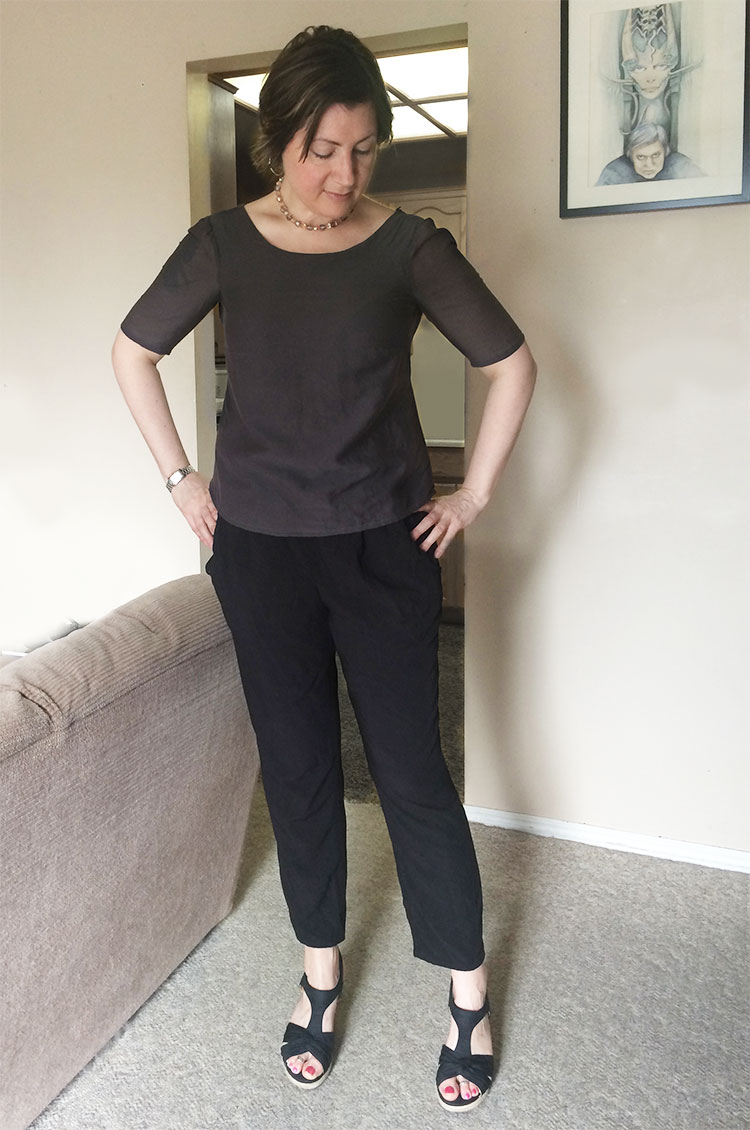
  • 2 x Named Quinn blouse: one black, one white… I wear these ALL THE TIME and am planning a nice casual plaid one, which I will probably wear to death as well ^_^
  • my second pair of Named Jamie jeans in a black brocade, which i straightened the leg from the knee down for a more dressy slim trouser look.
  • Named Olivia wrap dress in blue raw silk knit (also worn a LOT, and am planning another)
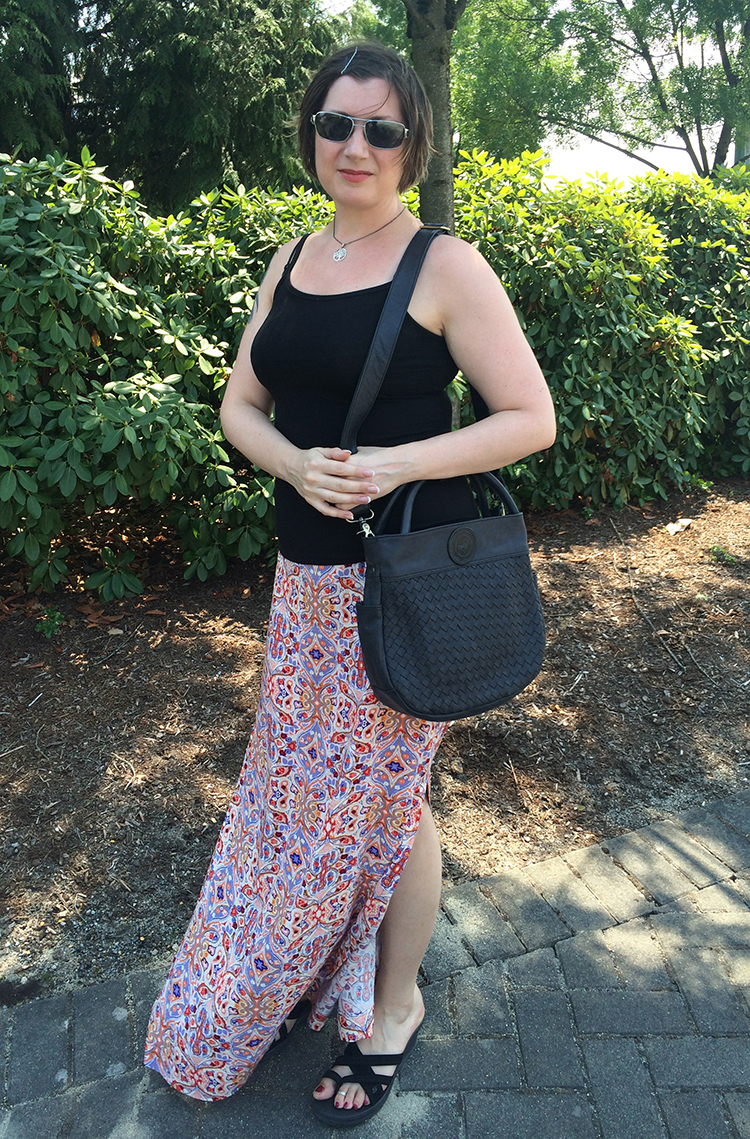
  • Victory Patterns Sophia Skirt from Boundless Style – love this and would wear it a ton more if it wasn’t such a wild, distinctive print; I need to make one in a nice neutral solid or a more subdued print, and then I’d live in it ^_^
  • Vogue 1323 (OOP) blouse in a blue pansy print
  • a pair of Burda pleated trousers in a thin wool suiting; never wear these because they are way too tight at the calf; I’ve learned I need to make MAJOR calf adjustments when I’m sewing fitted pants LOL
  • Named Lexi dress in a shibori viscose print – I love this dress, and was super pleased with my print placement on this one, need to shoot/blog it soon
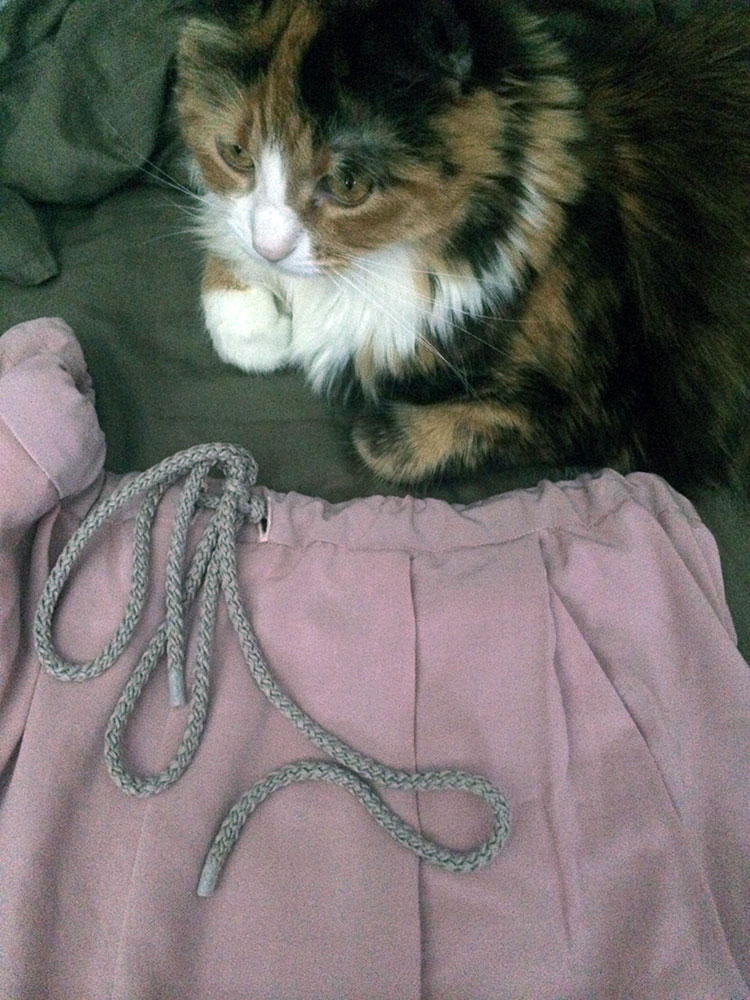
  • Named Astrid wrap pants in black tencel viscose twill – love these, they are perfect for the office in summer; light, flowy and comfortable 🙂
  • two Grainline Lark tees – love these, and have more planned
  • Named Grace corset top in a lightweight denim shirting
  • Victory Patterns Trina wrap top – need to shoot/blog this soon!! So pretty!
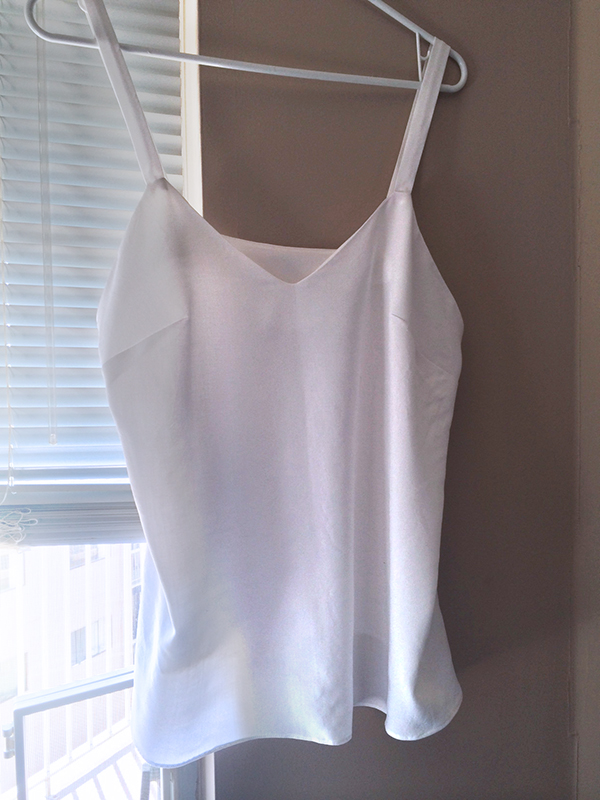
  • self drafted tank top in a metallic/silk blend for my birthday (photo below)
20160901_003248

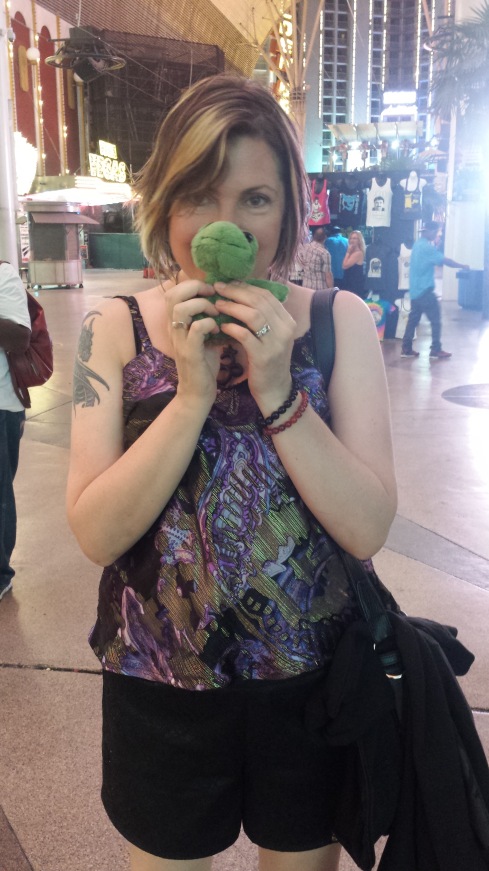
Self drafted tank top and BHL Holly shorts – Ben the Turtle helping me pose and celebrating in Las Vegas for my 40th birthday!! ^_^

  • two pairs shorts from the BHL Holly pattern – this pattern is definitely a TNT for me; I’ve made four garments now from it and am planning a fifth.
  • self drafted tank dress in Nani Iro double gauze
  • Closet Case Files Sophie swimsuit!!! The first swimsuit I’ve made and the first time I’ve been photographed wearing one since I was basically a toddler LOL (photo below because I’m crazy like that… no judgement please! LOL)
20160831_161517

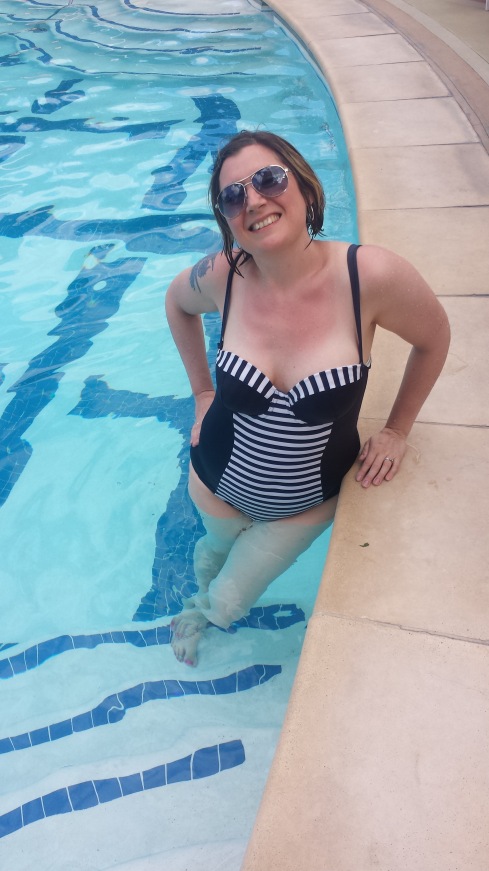
Closet Case Files Sophie Swimsuit in action at the pool in Las Vegas!

There have been a couple of duds in addition to this, mostly due to bad fitting and to some degree, bad fabric. But two duds in this huge pile of wins  is a lot better odds than I used to get! ^_^

Anyway, that’s it for now; I’ll hopefully try and get the next post up before another year passes! HA!


Wedding Planning, Designing a Dress, and KITTENS!

Well I knew this would happen but I thought I’d be better at managing it: I’ve become a bad blogger due to being immersed in the throes of wedding planning. I have nothing very meaningful to blog about, since my future husband reads my blog and while nothing else at all about our wedding is traditional, I am trying to keep anything bride-related secret from him, or as much as I can do, living in an apartment together ^_^

We are just having a small wedding; less than 20 people, but the planning is still a lot more stressful than I anticipated! There is still just as much work to do, only it’s on a smaller scale. Fortunately, we are doing pretty good ticking off our to-do lists.

For me the biggest hurdle to cross, of course, has been making my dress. I initially thought it would be exciting, an amazing challenge, and such a fun project. But I quickly became overcome with all the different choices, and in trying to decide what style of dress to make I found myself overwhelmed: what if I picked the wrong style and regretted it? You only get one shot… what if I picked something too boring and it wasn’t “special” enough? What if I picked something too difficult and I didn’t have the skills to execute it? What if? What if? What if?

Finally I settled on a design, and then I had to try and find a pattern. Again, the stress… should I just draft it? Am I really that crazy? But every pattern I looked at had some feature that wasn’t quite right so I would end up having to change it anyway. Then, miraculously, I found a vintage Dior pattern that was pretty much exactly what I was looking for.

The next hurdle was fabric. Readers, you’d think this would be the MOST fun part, and I honestly thought it would be (and I still think it SHOULD be!). I spent a lot of time and money selecting and ordering swatches, paying a small fortune in shipping just to make sure I got it right. I picked my perfect fabric and ordered it, and breathed a sigh of relief. Then, two months later, my fabric still hadn’t arrived. Long story short and a bit of a nightmare later, I had to source a new fabric from a new supplier, and start over.

So fast forward to about a month ago, and I FINALLY got my fabric, my pattern, now it was time to start doing the fitting. And boy, do I hate that part LOL. This is a designer dress, which means it’s constructed in as few pieces as possible – which sounds easy but when you have to do a massive FBA it’s not. Not only did I have to figure out the fit on a very odd bodice, but then I had to decide – woe of all woes – how in blazes I was going to construct the thing. Because the instructions – vintage, bless them, call for overlocked seams, and we all know that’s just not acceptable on a WEDDING DRESS (at this point I do realize it’s ridiculous how much angst I’m causing myself). So for the last few weeks, I’ve been simultaneously making a test garment, as well as agonizing over all the possible ways I could finish the insides.

Now, I’m almost ready to cut into my beloved fabric. Readers, I’m kind of terrified. Because there is something about making your wedding dress that lays bare all your shortcomings which you are very adept at hiding from yourself in regular garment making. I am not fastidious. I have a tendency towards impatience, which leads me to rush and cut corners. I am also running out of time. I am terrified my dress is going to end up some nightmarish creation of bollocks that looks like a cheap, badly fitting polyester taffeta Halloween costume purchased hastily at the 25th hour from the dollar store. Which considering how much time and money I’ve invested in it, would be a terrible travesty.

So, I’m trying to force myself to take it slow, thinking and planning, and not rushing. Which means the blog gets neglected.

Which is good, because I have nothing to blog about anyway LOL.

So in the meantime, here are some pictures of our kittens – they are growing SO FAST!!!

Katydid & Cricket

Upside-Down Cricket

Katydid & Cricket

Katydid in a Basket


Named Rene Maxi Skirt

Hola amigos! I am so excited to show you this fantastic skirt – the Named Rene maxi skirt, which I’ve long LONG adored, and which i bought immediately after they did the re-release of their first season on pdf.

Rene-maxi-skirt-linenprint-2

Named Rene maxi skirt in linen-viscose blend

This skirt has everything I love: firstly, it’s a maxi skirt, which I pretty much live in, in the summer. It’s a simple long line, slightly flared at the bottom, without too much fuss; has long vents up each side, is partially lined, and has a clean, semi-high waistband with zipper closure. I did not take pics of the zipper or the lining, sorry! LOL You’ll have to take my word, it’s a lovely style. The second I put it on, I was in love, and wore it straight away – that NEVER happens with new makes, for me – usually they need some time in the magic closet, as I’m kind of turned off by it by that point LOL.

Part of it obviously has to do with the wearability of this great pattern, but the other part is this fabulously bright fabric from Blackbird Fabrics – a gorgeous linen/viscose blend which is absolutely heaven to wear in hot hot weather: it’s soft and cool and flowing, just as a summer fabric should be. Sorry peeps, I bought it all – but they always have great prints in lovely fibers available 🙂

Here’s a little peek at how the vents show when the wind blows it around:

Named Rene maxi skirt - vent action!

Named Rene maxi skirt – vent action!

The pics here are taken the second time I wore it, when the weather hit 35 degrees Celcius just over a week ago – yuck!

The first time I wore it was the day I finished sewing it, and I wore it for a very special occasion: to go visit our NEW KITTENS!!! Yes, we are adopting two beautiful rescue kittens, and we are so excited! They are still too little to leave their foster mommy, and need to be spayed still before we can take them home, but the adoption date is scheduled for July 24th, just over a week 🙂 We are counting down the days!

Happy Forest Kittens - Cricket & Katydid

Happy Forest Kittens – Cricket & Katydid

The little calico is named Cricket, and the sweet Siamese is named Katydid (or Katy for short). All four kittens in the litter were named after forest bugs/animals, since their mama is a forest feral – part of the TNR program in Langley (Trap-Neuter-Release: a program designed to reduce the feral animal population in the most gentle, humane and stress free manner possible). One of the toughest parts for them is trapping the pregnant moms, because they are understandably very skittish, and if they have their babies in the wild, the mama hides them, and many of them do not survive 😦 But luckily they were able to nab these babies’ mama while she was still pregnant, so the kittens could be born in safety. Mama has since been spayed and released back into her colony, and is living happily ever after 🙂 These little ones will have a much more pampered life, but we know they’ll always have roots in the wild! ^__^

If you’re interested in learning more about the program, the website is www.tinykittens.com. There is a writeup on these kittens’ story, and you can watch them on Livestream 🙂 There are also write-ups on all the past kittens that have been fostered in this program as well. They really do unbelievably amazing work, and so many little precious lives are saved because of all the wonderful work they do! 🙂


Oh la la – I made a bra!

Yes, the bra making adventures continue! 🙂

  
So after I made that first Watson bra, I adjusted the fit on the cups, ripped it apart & re-sewed. Probably should have just re-cut and re-made the whole thing from start to finish, just salvaging hardware, but now I know better 😉

Next, I made the Pin Up Girls Classic Bra, following the Craftsy course – it’s a fabulous course & taught me a whole bunch! 🙂

The fit was not ideal on my first draft. I was actually pretty upset at first because I thought I might need another cup size, which would mean I’d have to buy a new pattern, but the lovely and wise Beverly suggested I might just need a little extra added to my upper cup so, just like you would with any other garment muslin, I cut a slice into my upper cup and bam!! I had a better fitting bra – it was pretty comical how my bust just kinda sprang into place with that little extra room lol. The wedge I added to the pattern is pretty big – 1.25″ – and I haven’t sewn it up yet but when I do I’ll share my findings 🙂

Next I decided to try the Orange Marlborough Bra. I love the style and had a kit from Merckwardigh I was willing to sacrifice for a test run lol. The lace is a stretch lace, white with black detail, so I decided to play with this by lining the lower cup, bridge & frame in white, the power band in black, and leaving the upper cup unlined. You can see the contrast better from the inside but the subtle contrast is nicer on the outside.


I doubled up the lace for the band, and used the lace scallop as the bottom trim on the back band, but finished the frame at the bottom in band elastic as normal. I also had to cut the width at the back band down quite a bit to fit the 2×3 closure on.

I would probably prefer the feel of the band being in powernet next time but otherwise, I love the way it looks and feels! 🙂

  
I was thrilled that the bra fit and looks great on without adjustment so I bar tacked the underwire casing closed and sewed on a pretty jewel at the center. Will DEFINITELY be making this beauty again!! 🙂 


NL 6096 & Shiseido Event

Recently, I entered to win an invitation to a VIP event in Vancouver, presented by Shiseido Canada in partnership with renowned beauty expert Dave Lackie and celebrity makeup artist, Nina Westbury. When I  learned I was one of the lucky recipients, I could hardly believe my luck! Back in the day, when I was a makeup artist myself, I would attend product launch events sometimes (and loved them!), so it was a really lovely treat to be able to meet these wonderful people in person and participate in an evening celebrating beauty once again 🙂

As the event was hosted in a lovely candlelit room, my pics are a bit grainy, but I wanted to share them anyway as I think they will get the point across, and you’ll forgive the image quality, right? 😉

I had never been overly familiar with Shiseido products, but my perception was that they had quite a good reputation for quality, and I was not wrong. They place a lot of focus on research and technology, employing over 1000 scientists purely for the field of research into skin care breakthroughs, and even have their own wing at Harvard.

lovely packaging for a lovely product

lovely packaging for a lovely product – Shiseido Ultimune

The event was held at a hotel downtown Vancouver and the care and attention put into the decor and presentation was impressive 🙂

florals

Raspberry flavoured champagne and peonies by candlelight 🙂

The gorgeous table settings and room atmosphere

I was fortunate after the event was over, to have the opportunity to chat one on one with the hosts – all absolutely LOVELY people and so generous with their time, taking a moment for everyone who wanted to talk 🙂

portrait-collage

Me getting to meet some of the loveliest people in the beauty industry! Clockwise from top: Elaine Shigeishi, Shiseido Vice President; Dave Lackey, beauty editor, and Nina Westbury, makeup artist

swag

Sweet, sweet loot!! A swag bag for everyone attending, including eye shadow palette, mascara, eye makeup remover, eyelash curler, and a generous sample size of the new Ultimune Eye. We also received a lipgloss, which has already replaced my previous favourite and taken up permanent residence in my purse LOL.

And for anyone who is interested in what I wore, I made New Look 6096 in a lovely cotton eyelet from Blackbird Fabrics. It was a pretty quick make, but because of the construction method, you really can’t check the fit until it’s done. The top of the bodice and waistband use elastic for fitting, but there is SO MUCH EASE built in that the fabric poofed out quite a bit, between the waist and the bodice top edge. I pinched out a 2″ wedge on each side and sewed it down, elastic and all LOL. Thank goodness my machine is a beast, and can handle half an inch of layers! It’s not perfect, but makes the dress wearable, and I think it works well enough. Obviously, were I to make it again, I would adjust the flat pattern considerably to ensure a better fit.

The bodice instructions call for the fabric to be self-lined but because I was using eyelet as my main, I used a cotton batiste to back it (which I was going to do anyway LOL). In addition, I drafted a short lining for the skirt bit, because, eyelet LOL. I left the lining short enough to allow for several inches at the bottom where the eyelet could shine on its own.


NL6096-1

All in all, a pretty wonderful evening was had – I met some great people, had an excuse to make a cute new dress, and I am looking forward to trying all the new products!! 😀


My first Me Made May – a brief recap

I know there are mixed feelings out there about Me Made May, but I was kind of excited to participate in it for the first time this year, because this is the first year I’ve felt like I actually have enough self made garments to make it plausible.

That said, I knew I wasn’t going to be able to do daily photos, but since the point of MMM is not necessarily to share your daily outfits, but to challenge yourself and learn something, I did want to find a way to make it worthwhile. So I decided to keep a journal, noting what I wore, and what (if any) lessons I learned along the way.

The lessons I learned were interesting. Early on I realized I wasn’t going to be able to put together an interesting variety of cute outfits like many bloggers do. I simply don’t make certain aspects of my wardrobe. Like t-shirts. I wear them all the time, with everything, but I don’t make them. Why? It begged the question: is having self-made items the important part for me?

The honest answer is that I didn’t get into sewing because making is the important part. I got into sewing because first and foremost, I was tired of never being able to feel good in my clothes. I could never find anything that fit me properly, in fabrics and styles that felt like me. I also make for the joy of learning, and I’ve found myself being stuck in a bit of a planning rut at times, following a list I made instead of making what feels right. I’ve begun to change that, and follow my instincts instead, which is working out quite well 🙂

Ultimately, knowing it’s handmade is a bonus for me, not the main goal, so if areas of my wardrobe are not covered, it’s not a big deal (ie: tees, workout wear, lounge wear, bras & undies). That said, with thought and attention, I’m beginning to notice where these “missing” areas could use improvement, i.e.: the length in my pj pants (which, like trousers, in RTW, are always at least 3″ too short LOL)

I had pledged to wear at least one self made item per day. Except for two days in the beginning, I was able to achieve this. That said, there were a LOT of repeats. I mean, a LOT. As in, if it wasn’t for those PJ’s I made, I would have only made it about half the time. The rest of the time saw me choosing comfortable, easy basics and separates most of the time. Other than my PJ’s I wore my Alexandria trousers to death (I even inspired a woman at the fabric store to make a similar pair!! LOL)

Inspired for my obvious need for easy-to-wear basics, I also managed to sew a couple new things while I was over-wearing my favourites LOL. I made a pair of black linen trousers (unblogged), a white acetate cami (self drafted, shown below) and another Mission Maxi from some delicious bamboo knit (my beloved black one needs a break after being over-worn every summer for the past three years LOL.)

Mission Maxi in stripy bamboo jersey

Mission Maxi in stripy bamboo jersey

stripe matching win! not so easy in jersey :P

stripe matching (almost) win! Not so easy in jersey 😛

self-drafted cami in white acetate

self-drafted cami in white acetate

getting better at the narrow hem!

getting better at the narrow hem!

So I feel like it was worth my while to participate in Me Made May. It challenged me to put some extra thought into why I make things, and what I should focus my attention (and precious time) on, going forward. I have also learned to let go of my very rigid and structured way of planning things, and allow myself to make what I FEEL like making, because ultimately, those are the things I enjoy both making AND wearing… and really, in the end, if it’s not enjoyable, what’s the point? 🙂


Black Sheep PJ’s for Mum’s Day

My beautiful mum loves sheep, and she has always said she is the black sheep of her family… and while our family was considerably smaller, I grew up feeling the same way. My mum taught me it was ok to be different, and sometimes even a good thing; as long as your values are solid, which because of her, they are 🙂

So for Mother’s Day this year I was inspired by this fabric from Blackbird – it’s a Japanese cotton with little sheeps all over it – I thought, what if I made her some pj pants, and coloured in just one little sheep to represent her black sheep persona? 🙂

And what if, I made myself a matching pair so we could be black sheep together as mum and daughter?

So with this idea germinated I went forth and did just that 🙂

(pic of me in mine… no pic of mummy in hers, but she was pleased with them nonetheless)

sheeps

Closeup of the two black sheeps:

black sheep

I did some test sheep first, to decide what medium to use to colour them in, and did a wash test to determine which would wash the best. I chose to use acrylic because it gave a kind of wooly look once it had been washed:

washed-sheep

And just because it’s been a trend lately, I’ll include another pic of Lola:

lola-in-a-box


It’s Elementary, My Dear

So no big deal, I just sewed a bra & stuff 😉


Yes, this is the oh-so famous Watson by Amy of Cloth Habit 🙂

Because of my love of corsetry, I have been tempted to try sewing lingerie for awhile but nothing has motivated me enough to actually DO it (I hate sewing knits lol) until I saw this pattern. They just don’t make soft cup bras for large cup sizes, so I was really intrigued to see how the fit & support worked; at least for lounge purposes.

According to pattern I’m a 36F, but there were no pattern pieces for that so since my RTW size is 36DD I cut a 36E.

It is still a little big: there are some vertical drag lines at the top of the cup (which you can see more on me than on Patience); a little gaping under the arm & the top of the cup sits a little too high: all indications I need to go down a size, according to the sewalong – so next time I’ll try a 36D.

Construction was pretty straightforward: the instructions are thorough, illustrations were spot on, and really clear & helpful. However (as a noob) I was still a bit confused on the strap construction. My straps ended up too long, for one thing: there is a guideline for length at the beginning but no provision for adjusting later if you’re like me & do something wrong lol: I inserted it through the slider wrong like a dope, so I just went back & fixed it after I smartened up 😉

Also, the outside gives a nice finish with the topstitching but there is no accommodation for inside seam finishing in the pattern so my insides look a bit messy; no biggie but I might serge my edges before construction next time.

As a side note, I later discovered quite a bit of extra info was all covered in excellent detail on the sewalong including fit adjustments & more details on construction. Very helpful & answered some of my lingering questions after I’d finished 🙂

I did find when attaching the cups to the cradle that I had 1 cm extra on the cups at the side seams; I ripped out & inserted the first cup twice, ensured the center notches were matched, and I still had this on both sides so not sure if the pattern has an error? I trimmed them off flush with the band & it worked fine 🙂

The nitty gritty: it’s comfortable – much more so than an underwire bra lol. Support for large cup size is not bad! – definitely less than what an underwire bra gives, but more than braless lol; it gives a more natural silhouette – kind of “support lite” – definitely nice for lounging & looks seamless under tshirts.

The back sits quite low and the front is a nice deep V, which i quite like; would be great option for a lower cut dress in front or back; something I’ve never even considered as a larger cup size since the only other option is braless and that’s not an option at all lol.

One last thing: my supplies 😉 I want to shout out to Caroline from Blackbird Fabrics – I purchased one of her kits to make this one & not only was it lovely & of great quality, she is just a peach to deal with 🙂 I love being able to support a local company and my credit card hasn’t cooled off since my first purchase there lol 😉

In conclusion: my first foray into bra making was pretty successful! I learned a lot and am looking forward to perfecting my fit (I’ve started critiquing my RTW bra fit now too lol) 🙂 I also really loved that it was so space friendly: tiny pieces mean less fabric consumption too, and there was still enough room for Lola to share my sewing table ^_^ 


Named Alexandria Pants (and shorts!)

Further to my adventures with skinny jeans, I decided it was time to explore the non-bootcut style trouser in a new way 🙂 Enter Named’s Alexandria Trousers/Shorts – a pattern I fell in love with immediately and had to bump to the top of the queue.

The first version of these I made from a mystery fabric in my stash, what I thought was perhaps a linen. It frayed like the dickens and pressed well, so I was probably not far off LOL.

Alexandria-detail

(Here you can see the cool pleats that fold over the side pockets. Those are SO MUCH FUN to sew, and they give the garment movement and visual interest that I absolutely love.)

They turned out PERFECTLY except for some tightness in the calf (which I should have anticipated after the same thing with my Jamie jeans), alas, the first time I wore these, I knelt down to grab some shoes from the closet and RIIIIIPPPPPPP – out blew my right knee. (the pants knee, that is LOL).

I was pretty shocked, to say the least! We were on our way to do groceries so I figured, ok, I’ll wear them out for that, and then cut them into shorts when I get home, because it was probably the calf tightness that did it. But nope, shortly after I first sat down, RIIIIIPPPPPP – out blew the butt. Seriously LOL. THE BUTT. So serious, guys. I was super upset at the time, because I put a lot of work into finishing all the seams neatly, and pressing the pleats perfectly, but even though it’s a shame, it’s pretty funny now thinking about that fabric just blowing up on me LOL ^_^

So I took the opportunity to add some width to the lower part of the flat pattern, from the knee down; about 1.25″ tapering to 0 at the knee. And then I made the most comfortable, stylish black pants anyone has ever made, ever. Ok maybe not anyone, maybe just me 😛

Alexandria-black_pants

These are made from a lovely black rayon which is wonderful to wear, but was a pain to cut and sew. I admit, I was still traumatized over the amazing exploding pants, so I didn’t take as much care as I should have, and I partly botched the waistband, in true Amanda style, and wound up with a narrower waistband than called for, so I omitted the waistband ties, which is fine – I’ve been wearing them as a dressy-casual pant like in the above photo, or with socks and heels when it’s raining, which is always these days ^_^

I also made the shorts version, in a blush pink rayon, which I haven’t had the opportunity to wear yet, as our weather has been pretty unpredictable, and not quite shorts-time. Also hence the grainy indoor pics – I continue to lament my lack of a decent photography spot…. it’s really appalling.

Lola wants them because they match her nose ^_^

Will I make these again? Damn straight – probably the next time I spy a fun print in a lovely drapey fabric – and since I wear the black ones all the time (ALL the time) I’m guessing I’ll probably have to make another pair of those too ^_^ 😀


Papercut Bellatrix Blazer

So I made a blazer 🙂


Inspired once again by Anne’s numerous makes, I was turned on to the clean lines and versatility of this pattern.

Although I really like the short version, I settled on the longer version first, as the fabric I used was more dressy and i wanted it to be wearable for both office attire and with jeans.


I swear it’s pressed, but the fabric has a soft drape and texture, making it appear creased, which along with a burn test, makes me think it’s linen or a linen blend.

I’m showing it pictured here on Patience, as it’s easier to get a feel for the style lines and texture of the fabric when it’s sunny, and it was, fortunately, when I finished it and took these shots – but hasn’t been lately 😉 

I found it interesting that the pattern calls for most of the body to be interfaced, but I wanted to keep the softness of the fabric so I used a weft interfacing in a little lighter weight than my fabric. It was the first time for me using this type, and with all the steam required to press & shape these seams I feel like I probably should have pre-shrunk it because it shrank during application so I steamed the crap out of it before sewing so it wouldn’t cause me too much heartache later on. It still did, but not too badly 🙂

I also added a self drafted sleeve head for a little extra support.

The lining is a superb quality Bemberg rayon which is just a delight to touch and wear but as always, I despise sewing lining because Bemberg is notorious for misbehaving lol.

As for fit, I did two FBA’s; one and then another adjustment again after my first muslin. I adjusted the waist just the once but should have tweaked that as well the second time; that said, it fits with a hook & eye at the waist rather than a buttonhole so that’s fine. I also lengthened the sleeve 3″. These are all standard adjustments for me so pretty much normal 🙂

I would like to make this again, in the shorter version but I plan faster than I sew so may not happen anytime soon, as I have a massive queue, including wedding sewing lol 🙂

In other news, Me Made May is fast approaching and I’m taking the pledge for the first time! 🙂 I know I have really limited choices in lounge wear so I suspect that will be my biggest challenge but challenge is the whole point! I’m nervous but excited to see what I learn 🙂 Anyone else joining in? 🙂